

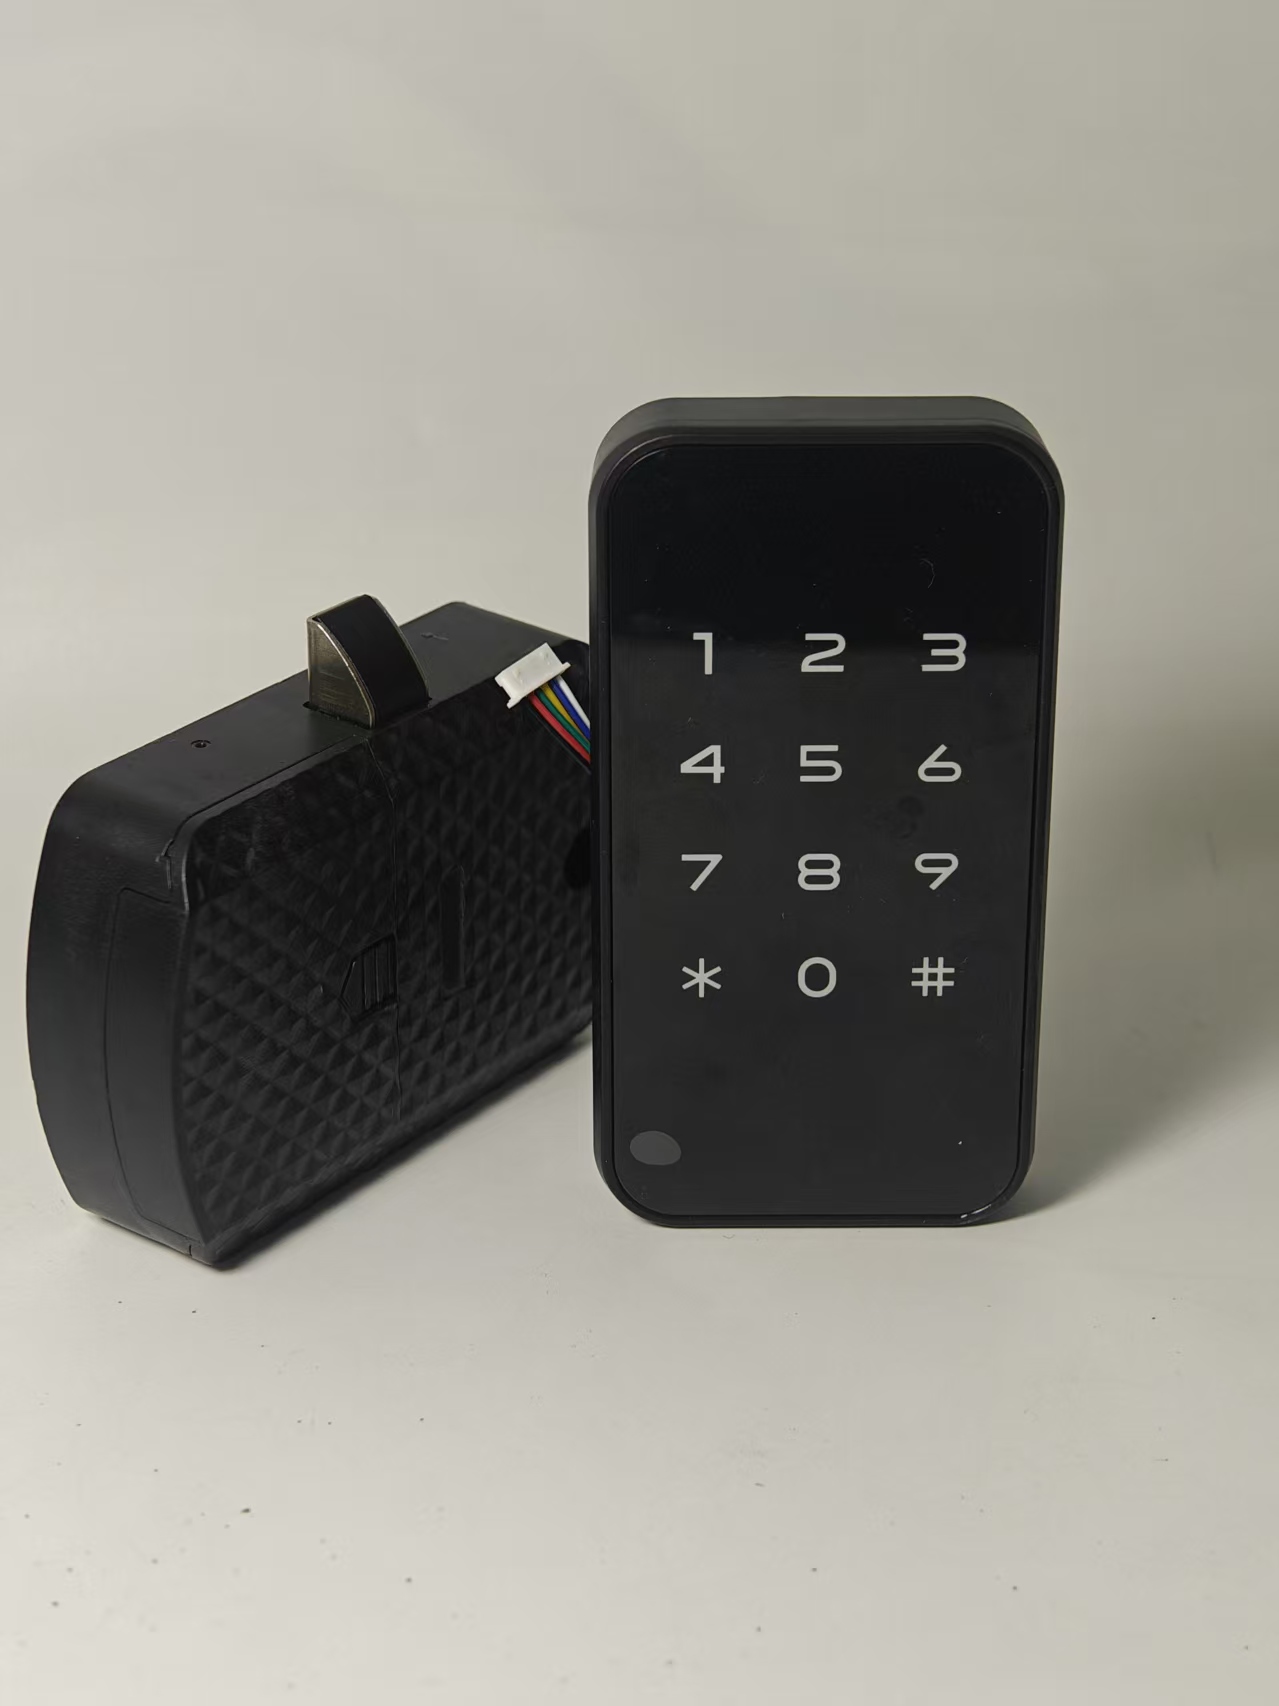

Instruction Manual for A-ES827 Series Fingerprint Bluetooth Cabinet Lock
Model No.:
Notes:
1. ES801B and ES827B are equipped with fingerprint, graffiti and Bluetooth functions.
2. ES801, ES801 Round, ES827 and ES832 are single-fingerprint models without fingerprint and Bluetooth functions.

Lock Body Model:

Product Installation Prompt
It is recommended to install this product following the steps below

Notes:
1. After receiving the product, it is recommended to install the batteries and connect the wires before formal installation, then conduct a simple test on the basic functions of the product. Check whether the latch retracts and extends normally, fingerprints can be enrolled smoothly, and Bluetooth connection works properly.
2. It is advised to complete all settings before installation. This can avoid wasting installation time if any problems are found after the product is installed in place.
3. Install the buckle first, then the lock body, and adjust the installation position of the lock body according to the position of the buckle. The buckle adopts a concealed installation design. If reinstallation is needed due to installation errors, it will not affect the overall appearance of the product. However, reinstalling the lock body caused by position errors may compromise the aesthetic effect.
Product Operation Instructions
To facilitate the use of this product and cater to the usage habits of more users, models ES801B and ES827B support local management and mobile phone graffiti Bluetooth management; models ES801, ES801 Round, ES827, ES832 and ES833 are equipped with local functions, which are introduced as follows.
By default, the product is set to Demo Mode upon initialization. "In Demo Mode, any fingerprint can unlock the device."
Local Operation Instructions
By default, the product is set to Demo Mode upon initialization. "In Demo Mode, any fingerprint can unlock the device."
1. Light Indications:
• Successful fingerprint verification: The blue indicator light flashes once, indicating the device is in factory default state
• Successful fingerprint verification: The green indicator light flashes once
• Failed fingerprint verification: The red indicator light flashes 2 to 3 times
• Factory reset via Morse code: Green light followed by blue light
• Low battery alert: After successful fingerprint verification, the green light flashes once and the red light flashes three times to indicate insufficient power
• Registration timeout: The red indicator light flashes once
• Reset timeout: The red indicator light flashes twice
2. Fingerprint Registration:
The registration process will exit automatically if timed out, and you need to restart the process afterward. The red light flashes once when registration times out. (Note: Two fingerprints are registered by default for the first registration)
2.1 Press and hold your finger until the sky-blue (blue) light stays on, then lift your finger; (Note: For products with graffiti Bluetooth function, Bluetooth broadcasting will be activated for 90 seconds after the sky-blue light turns on, allowing Bluetooth connection synchronously)
2.2 Start fingerprint registration; (Note: The default registration times are 5 for ES827B and ES833; 6 for ES801 Round)
2.3 Lift and press your finger continuously ten times until the green light turns on, which means the first fingerprint is registered successfully; (Note: The default registration times are 5 for the first fingerprint of ES827B and ES833; 6 for the first fingerprint of ES801 Round)
2.4 After the first fingerprint is registered successfully and the blue light turns on, change to another finger to register the second fingerprint. Lift and press the new finger ten times continuously until the green light lights up, indicating the second fingerprint registration is completed. (Note: The default registration times are 6 for the second fingerprint of ES801 Round; 5 for the second fingerprint of ES833)
(Note: When registering fingerprints, lift your finger after each press instead of keeping it pressed. Move your finger up, down, left and right during registration; do not press the same part of your finger for all ten presses.)
3. Add a new fingerprint:
3.1 After successful verification with a registered finger, press and hold until the sky blue/blue-green light turns on, then lift your finger;
3.2 Start registering a new fingerprint. Lift and press your finger ten times continuously until the green light illuminates, indicating the new fingerprint is registered successfully. (Note: The default registration times are 5 times for ES827B and ES833; 6 times for the round-shaped ES801.)
4. Use of Morse Code: (All fingerprints cannot be restored after factory reset.)
4.1 Restore Factory Settings via Morse Code
a. After fingerprint verification succeeds, press and hold until the blue and green lights turn on (do not lift your finger while holding);
b. Keep holding when the white light turns on (do not lift your finger while holding);
c. Release your finger only after the red light lights up. A single flash of the green light indicates all fingerprints have been cleared and the factory reset is completed successfully.
4.2 Setting the Emergency Password
a. After unlocking with a fingerprint, press and hold until the blue light turns on (do not lift your finger while holding), then release when the white light lights up;
b. After releasing, the green light will turn on. Each fingerprint press counts as one digit (e.g., pressing 5 times represents the number 5). After pressing the set number of times, wait for the blue light to turn on;
c. When the blue light lights up, press the preset number of times (e.g., pressing 6 times represents the number 6), then wait for the lights to go out after finishing the presses.
d. The number entered with the green light and the number entered with the blue light form a two-digit number (e.g., 56). Please memorize your password.
4.3 Using the Emergency Password
a. When fingerprint unlocking fails, press and hold with any fingerprint until the white light flashes, then release;
b. After releasing, the green light will turn on. Press the previously set number of times (e.g., 5 times), then wait for the blue light to turn on;
c. When the blue light lights up, press the preset number of times (e.g., 6 times), then wait for the lights to go out.
d. Before the lights go out, a flashing red light means the password is incorrect; a flashing green light means the password is correct.
e. If the password is correct, the lock will open automatically and restore to factory status, and you will need to register fingerprints again.
4.4 Notes on Using Morse Code:
a. If no emergency unlock password has been set, the default password is 33; if a password has been set, the default password will become invalid.
b. After restoring factory settings, the customized password will expire and revert to the default password.
c. Timeout will occur during the setting and use of the emergency unlock password, and the process will exit upon timeout, requiring a fresh start. A single red light flash indicates a timeout during password setting, while two red light flashes mean a timeout during password use.
Bluetooth Connection Operation Instructions
This product supports the Tuya APP. Please search for "SMARTLIFE" in the app store to download and use it.


1. Device Adding Process
Download the Smart Life APP/Tuya Smart APP from the mobile app store → Open the Smart Life/SMARTLIFE APP and tap Add Device → "Press and hold the fingerprint recognition area until the sky-blue indicator light turns on (you can enter fingerprints synchronously after the sky-blue light is on) to activate voice broadcast" → Tap Add when the device is detected → Return to the APP homepage after completion.

2. Add fingerprint users; Delete fingerprint users
a. On the main APP page, click in sequence → Member Management → Me → Add Fingerprint. When the blue light stays on, start fingerprint enrollment. Press the fingerprint continuously for 5 times (the default enrollment times for ES801B is 10 times) until the green light turns on, which indicates that the fingerprint enrollment is completed (move your finger slightly up, down, left and right during enrollment).

On the main page of the APP, click in sequence → Member Management → Me → Fingerprint → Delete

3. More Settings:
1. Remote unlocking unavailable after being disabled via the gateway; 2. Sensor calibration

4. Restore Factory Settings: (Note: "Unbinding must be performed when the mobile phone's Bluetooth is connected to the device. All fingerprints cannot be recovered after data clearance.")

5. APP Unlocking: Slide the key icon to the right to unlock the device.

6、APP主页面点击日志,可查设备操作记录
